


In any Dashboard,Time is an important factor. Users will always be interested in viewing the data by time period and also will be interested in performing comparitive analysis between 2 time periods.
In a data warehouse, a Time dimension table is usually present, which joins to the fact table and produces results.In some situations, time dimension is not present but a date field is present in the fact table.In such scenarios, it is a best practice to create Master calendar by taking the date field in the fact table. This Master table will contain all the combinations of date and time and will join to the fact table.
In this blog i will discuss how to create a Master calendar based on date field in the fact table.
In my previous blogs, i have loaded SalesOrderHeader table. This table contains OrderDate field.
You can always create Time values by applying date time functions on the OrderDate column
Year(OrderDate) As Order_Year
Month(OrderDate) As Order_Month
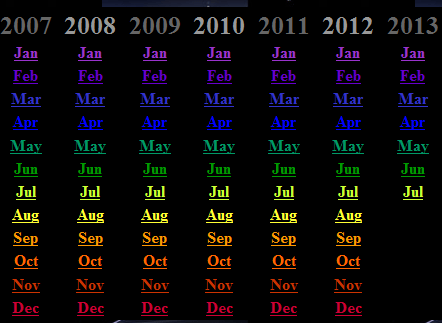
This will give you Year and Month values but it will give you only the values which are present in the database. If say, for example, there were no Orders in March then this method will not show the March month in the list box and date will not be continous.
To resolve this problem, we will create Master Calendar.
Steps:
1. Create or set the value of Min date based of the OrderDate in the SalesOrderTable.
This can be done either by hardcoding the start date or by taking the first value of the OrderDate by using Peek()
Peek() will give the value of the OrderDate in the first record
Let varMinDate = Num(Peek(‘OrderDate’,0,’OrderHeader’));
2. Create or set the value of Max date
Peek() will give the value of the OrderDate in the last record
Let varMaxDate = Num(Peek(‘OrderDate’,-1,’OrderHeader’));
3. Generate the rows in the calendar table by using Autogenerate. Autogenerate in QlikView is used to generate rows automatically.
TempCalendar:
Load
date($(varMinDate) + rowno() – 1) As TempDate
Autogenerate
$(varMaxDate) – $(varMinDate) + 1;
4. Create Master Calendar
MasterCalendar:
Load
TempDate As OrderDate,
Week(TempDate) As Week,
Year(TempDate) As Year,
Month(TempDate) As Month
resident TempCalendar;


 :
:
First of all. Thanks a lot for this tutorial.
I have just added master calendar to my qlikview page. Now, How do I connect this master calendar with other dates in same table? Let’s say, I have Order date and Ship date in Order table; I just connected Order date with my master calendar with above tutorial. Now, do I have to create another calendar table to connect Ship date ??
Thanks,
Rupesh
Rupesh:
You got it right. You need to connect your fact table with your calendar multiple times.
You do this by making copies of the Calendar table.
This concept is called role playing dimensions.
Please refer to my blog “role playing dimensions in QlikView”.
I have tried this in my script one after another and get the error:
Table not found
MasterCalendar:
Load
TempDate As ORDERDATE,
Week(TempDate) As Week,
Year(TempDate) As Year,
Month(TempDate) As Month
Resident TempCalendar?
William:
Only time you will get this error if you don’t have “TempCalendar” table present in your script.
Make sure before your above mentioned code, your script has
TempCalendar:
Load
date($(varMinDate) + rowno() – 1) As TempDate
Autogenerate
$(varMaxDate) – $(varMinDate) + 1;
Thank you Chandraish, I have it loaded okay. When I use the Master calendar as a dimension (Month for example), the aggregate is a count of orders, it is showing total orders from all months and not for my chosen dimension?
William:
Looks like your Master calendar table is not associated with the Orders table.
Once you link/associate them , you will see the desired result.
Script
DateRange:
Load
min(date([DATE TRAITEE],’DD/MM/YYYY’)) as MinDate,
max(date([DATE TRAITEE],’DD/MM/YYYY’)) as MaxDate
Resident ACTIVITES;
Let vMinDate = num(Peek(‘MinDate’, 0, ‘DateRange’));
Let vMaxDate = num(Peek(‘MaxDate’, 0, ‘DateRange’));
TempCalDate:
LOAD
date($(vMinDate)+RowNo()-1) AS CalDate
AUTOGENERATE $(vMaxDate)- $(vMinDate) + 1 ;
Erreur :
Scories après instruction
TempCalDate:
LOAD
date(41582,203472222+RowNo()-1) AS CalDate
AUTOGENERATE 42466- 41582,203472222 + 1
Result :
PERIMETRE << Activites_Codes 146 lignes récupérées
ACTIVITES << Activites_Consolidees 144 085 lignes récupérées
DateRange << ACTIVITES 1 lignes récupérées
TempCalDate << AUTOGENERATE(884) 884 lignes récupérées
Calendrier << TempCalDate 884 lignes récupérées
Minimum date:
04/11/2013
Maximum date :
06/04/2016
When i go and see the Master Table, it takes only the first Date, Please help me to resolve this issue.
Regards
jega
Jega:
Please review your code and see if you are missing some step or put it differently. Like the PEEK function.
I would suggest, do basic debugging. Comment your code and execute each line. Put list boxes and see if you are getting the desired result for that line.
For e.g. see if DateRange is getting created correctly. After that, check if your Variables for Min and Max date have the expected values.
Then check table TempCalDate and see if values are correct.
Looks like your TempCalDate is not generating correctly.
I have also mentioned the details on Master Calendar and other questions on real time scenarios in my book QlikView Questions And Answers
You can also get detailed explanations and sample Qvws in my book QlikView Essentials
Hi Sinha,
Thanks for the post and it worked for me perfectly after following the above steps.
Thanks and btw, i ordered your book as well. 🙂